MetaMask is one of the most popular Ethereum wallets. Designed as a web browser plugin, users can send cryptocurrency in standard transactions and interact with various decentralized apps.
How to Get Started
1. Install MetaMask
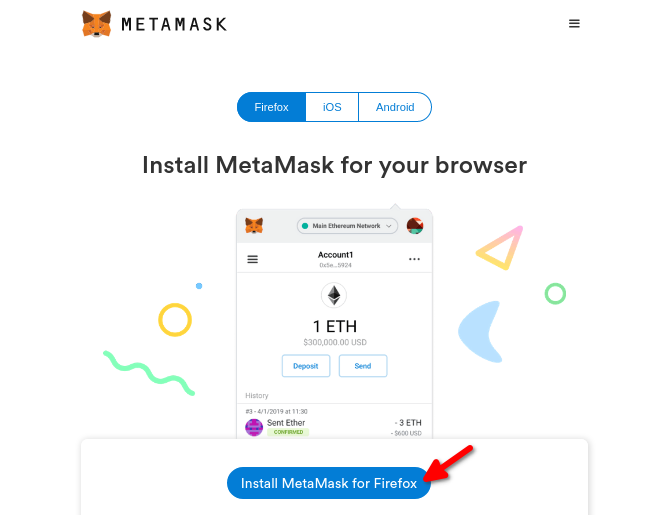
Install MetaMask from the project’s official website or an app store. It is safest to install from the official website because app stores have accidentally hosted fake MetaMask apps in the past.
Chrome, Firefox, Brave, and Edge all support MetaMask. Opera users can use MetaMask through Chrome extensions, though issues have been reported. Apple and Android devices also support the app.
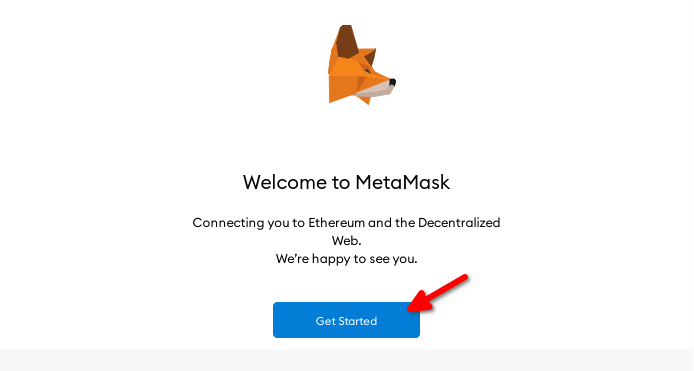
Once you have installed MetaMask, click on the MetaMask icon in your browser’s toolbar to open the app. Then, click on “Get Started.”
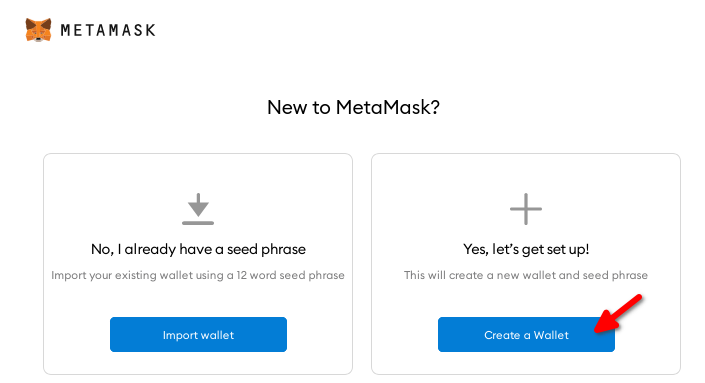
2. Set up a New Wallet
Click on “Create a Wallet” to make a new Ethereum wallet. (Or, if you have created one already, follow these instructions to restore your wallet and access your existing funds.)
Agree or disagree with feedback sharing to continue.

Create a password for your wallet. Though you should safely store this password, you can recover your wallet even if you lose your password.

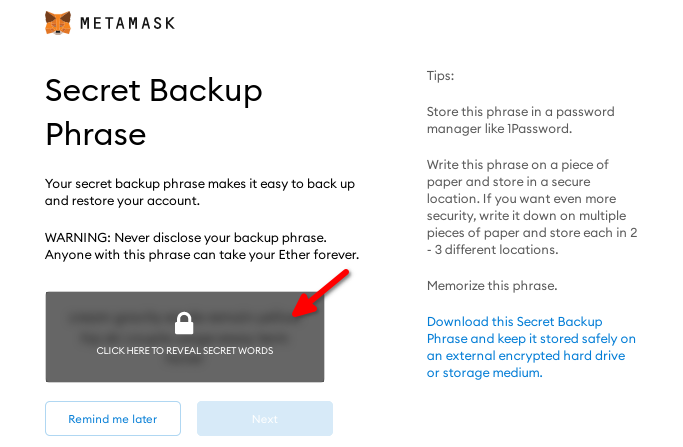
Click on the grey area to unlock your seed phrase. Be sure to store this seed phrase safely.
Anyone who knows it will be able to access your Ethereum wallet, and you will not be able to recover your wallet without it. You can safely store your seed phrase by making multiple backups or storing the phrase in a durable metal wallet.
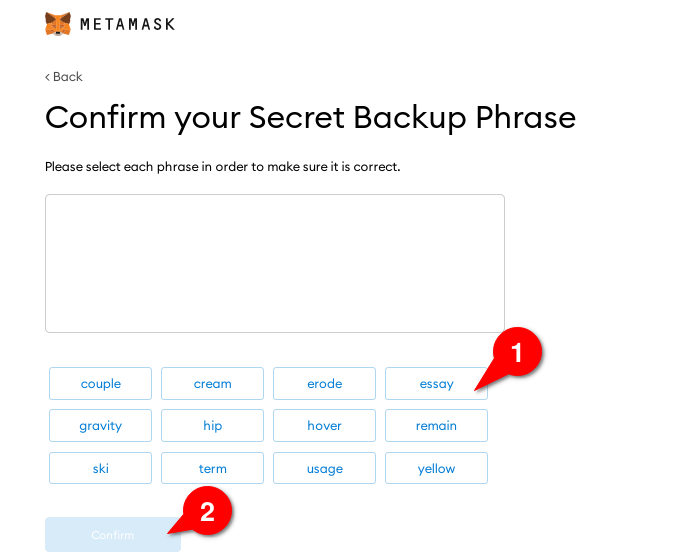
Click on your seed phrase’s words in the right order (1) to prove that you have written them down correctly. Then, click “Confirm” (2). Your MetaMask wallet is ready for use in transactions.
3. Buy or Deposit Cryptocurrency
Now you can add funds to your wallet. Click on your wallet address (1) to copy it, then send ETH to that address from an exchange.
Or, if you have not yet purchased ETH, click on “Buy” (2) to buy funds from MetaMask’s built-in exchange.
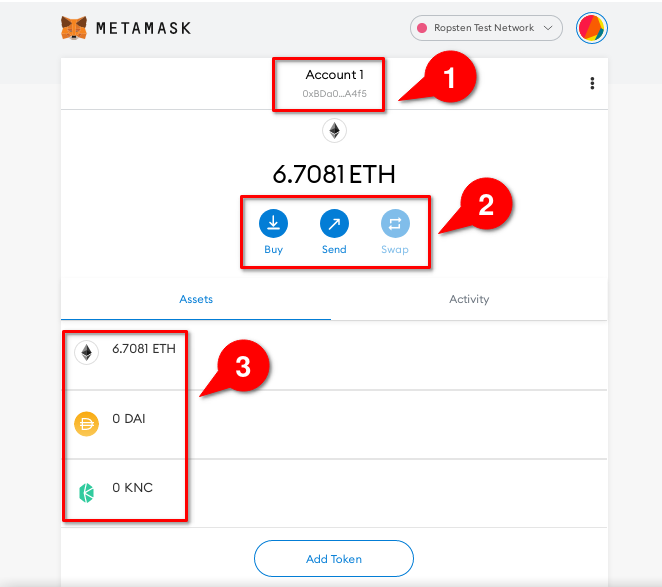
You will see your balance in the lower portion of the wallet (3) once your funds have been deposited. ETH will show up by default. If custom ERC-20 tokens do not show up, click “Add Token” to add those tokens to the list.
It may take several minutes for your ETH to arrive, depending on the amount of traffic that Ethereum is experiencing.
4. Send Cryptocurrency
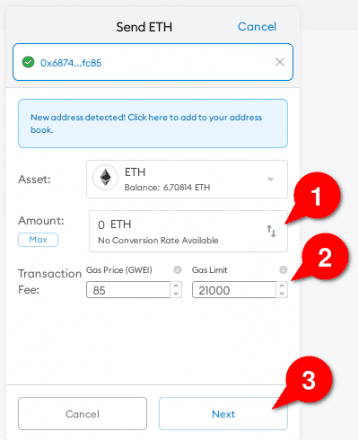
Once you own cryptocurrency, you can send your funds to other users, merchants, or your own additional ETH wallets. To do so, click on the “Send” button in MetaMask’s main panel. Enter the amount of ETH you want to send (1) and the amount of transaction fees you want to pay (2).
Then, click “Next” (3).
A higher fee will help your transaction get confirmed faster. MetaMask automatically sets a fee by default. However, sites like EthGasStation can help you find an ideal fee manually.
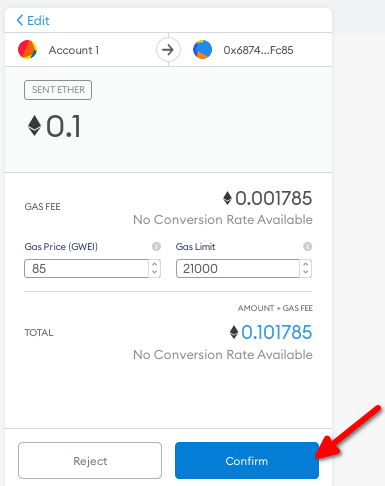
Click “Next” (3) to finalize the details of your transaction. Then, click “Confirm.” Once again, it may take some time for your transaction to be confirmed.
You can check the status of your transaction in MetaMask’s “Activity” panel. If your transaction stalls, see this page.
5.Add bPRCY/pPRCY/tPRCY/wPRCY token contract to your MetaMask wallet
To add bPRCY/pPRCY/tPRCY/wPRCY to your MetaMask wallet you have to follow these simple steps.
Open your MetaMask wallet and scroll down to you find “ADD TOKEN” button and click it
In the new Tab that will open clik on “CUSTOM TOKEN”
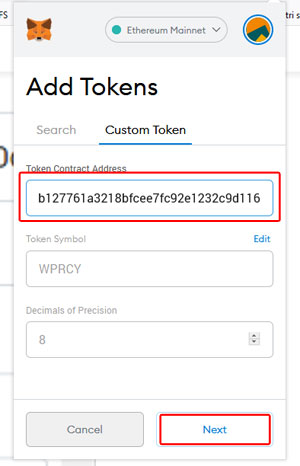
Now you will find bPRCY/pPRCY/tPRCY/wPRCY on your coin list.
6. Spend Crypto in a dApp
If you want to spend your ETH to purchase bPRCY/pPRCY/tPRCY/wPRCY in a DApp, chose an app from this:
Uniswap: https://app.uniswap.org/#/swap?inputCurrency=0xdfc3829b127761a3218bfcee7fc92e1232c9d116
SushiSwap: https://exchange.sushi.com/#/swap?inputCurrency=0xdfc3829b127761a3218bfcee7fc92e1232c9d116
SakeSwap: https://sakeswap.finance/#/swap?inputCurrency=0xdfc3829b127761a3218bfcee7fc92e1232c9d116
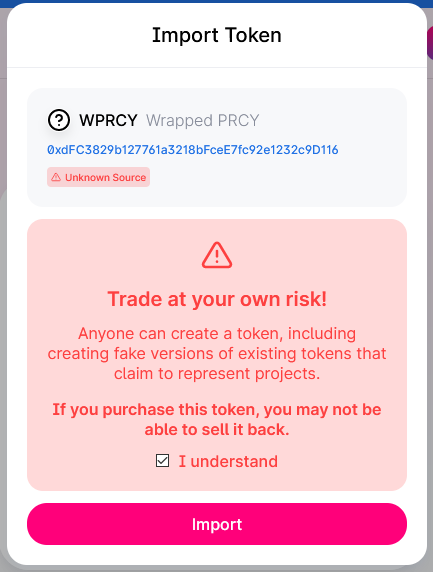
Visit the Dapp web page using the links provided and Import bPRCY/pPRCY/tPRCY/wPRCY token by checking “I UNDERSTAND” and clicking on “IMPORT”
Enter the amount of crypto you want to buy and choose the tokens you want to swap (1). Then, link your MetaMask wallet by clicking on “Connect Wallet” and choosing MetaMask (2).
A MetaMask panel will pop up. Connect to Kyber if it is your first visit. Click “Next,” then click “Confirm.”

Return to Dapp web page and click “Swap Now” (1). Then, in the popup, click “Confirm” (2) to perform the transaction.
Once you have done that, th Dapp will broadcast your transaction to miners. You do not need to wait for the transaction to be mined before closing the window. You can check the status later in MetaMask’s activity panel or on Etherscan.
What Can You Do With Metamask?
Now that you know the basics of MetaMask, you can use all of Ethereum’s features, including:
- Sending and receiving transactions between standard Ethereum addresses, such as those owned by individuals and merchants.
- Paying for transactions in DApps such as games, gambling apps, DeFi apps, and decentralized exchanges.
- Storing ETH and custom tokens (i.e., ERC-20 tokens).
- Storing collectibles and non-fungible tokens (NFTs).
- Connecting to Ledger and Trezor hardware wallets.